DIY Tabletop Epoxy Projects
 One big seller in arts and craft stores is epoxy. However, not everyone realizes how many different things you can use it for. Most people simply want to use it to cover a wooden table for their dining room or a small end table for their living room. These ideas are fine, but some people are able to take it to the next level. They have discovered the joys of DIY tabletop epoxy projects.
Creative Ideas
 It has become a trend among many to do more with epoxy. They are collecting pennies to pour an epoxy resin over them to create a table that stands out on their patio or in their sun room. Many people are also using sea shells to create a coffee table top for their beach themed homes. Farm house tables look great when covered with a few layers of epoxy, but they look even better if the epoxy is tinted to bring out the natural color in the wood. You can paint pictures on a wooden surface and then epoxy it to seal it in or place a picture that your child painted onto a canvas on a table to preserve it for years to come. Many people also use photographs, scrapbooking supplies, or leaves on the table to create a collage. Most epoxy is clear so that the colors will never become messed up by using it and you can cover a variety of things with it. Your creative mind is the only restriction.

How to Prep the Surface Area
When doing epoxy on a table, you need to make sure that the table top is cleaned thoroughly. You may even want to wipe it down with alcohol if you feel that there may be a little grease or oil on it. After that, you will need to lightly sand the surface down. This will remove any nicks in the wood or further eliminate built up dirt. Wipe the table top down again after you are finished sanding to remove dust. Before you pour epoxy, make sure your table has a small lip around its top to keep the epoxy from running off the table. You should also tape the edge using painters tape to prevent it from oozing between cracks.
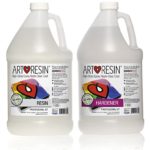
Cost to Create Epoxy Tables
The price of creativity will depend on the project that you are doing. If you are printing photos or using scrapbooking items or shells, you may have some cost there. The price of the table you are creating, if you purchase it for the project will come into the total cost. You will also have the price of the epoxy. Most epoxy products are affordable and you can have a newly refurbished piece of furniture for less than $100 that looks like it should be much more valuable than that.